
Section 17.4 · Chapter 17: Increase Efficiency
Object Library
The Object Library Window is a dockable window. It makes
configuring, managing and sharing user-defined objects easier. It contains
default objects, common objects, object groups and global objects.
■ Default Objects
Each type of screen objects can have one default object and the default objects
are saved in the object library. The settings of a default object will be used
as the initial settings for a newly created object of the same type. To view all
the default objects for the project, you can click the window tab named Objects.
You are allowed to specify any object as the default object for the type of that
object. The old default object of the same type is discarded when you specify a
new default object. To make an object as a default object, right-click the
object to get the pop-up menu and click the Save as Default command in the
pop-up menu.
■ Common Objects/Object Groups
The common object/object group can be used in the whole project. To view the
common objects/object groups, you can click the window tab with a user defined
name.
To make an object as a common object/object group, right-click the object/object
group to get the pop-up menu and click the Save to Object Library… command to
bring up the Save to Object Library dialog. In the dialog, you may type a name
and select a user defined category for the common object/object group.
■ Global Objects
Global objects can be used in the entire project. Any modification of a global
object will be applied everywhere it is used in the project. To view all the
global objects for the project, you can click the window tab named Global.
To make an object as a global object, right-click the object to get the pop-up
menu and click the Save as Global Object… command to bring up the Save to Object
Library dialog. In the dialog, you may type a name and select a user defined
category for the global object.
To open the Object Library, check the Object Library menu item in the View menu.
The following is an example of the Object Library Overview.
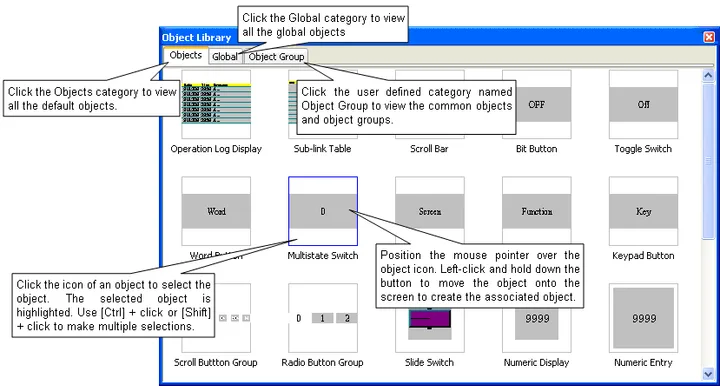
You can right-click the tab on the top of Object Library to get the pop-up menu with the following menu items:
|
Menu Item |
Description |
|---|---|
| Add Category… |
Create a new category for common objects and object
groups. The left dialog is an example of the Add
Category dialog for you to specify the category name and
icon size for displaying the object of the new category.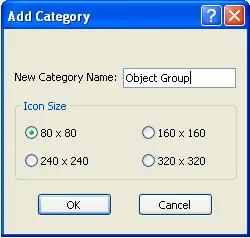 |
| Delete Category… | Delete the selected category. |
| Category Properties… |
Click the command to bring up the left sample dialog to
set up category properties. You can rename the category
in the dialog and define the icon size for the object to
be displayed.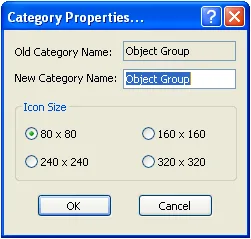 |
| Import Library… | Import an existing category from an object library file (*.pol) |
| Export Library… | Export a selected category of the object library to an object library file (*.pol) |
| Clean Unused Data in Library | Click the command to clean all the unused objects in the selected category. |
You can right-click the selected object in the Global category window or the user defined category window to get the pop-up menu with the following menu items:
|
Menu Item |
Description |
|---|---|
| Rename Object… | Click the command to bring up the Rename dialog to rename the selected object. |
| Delete Selected Objects… | Delete the selected object. |
| Object Properties… | Click the command to bring up the object properties dialog. Only available in the Global category. |
Need PM Designer itself?
V4 for current PK, PT, ITV and PM panels, V2 for older models. Free, sent by email.
Source.Section 17.4 of the PM Designer Software User Manual, Edition 2.0, © Cermate Technologies Inc. (www.cermate.com, service@cermate.com). Reproduced online, with the manual's own figures, by TSL Automation Solutions, authorised Cermate distributor, for users of Cermate HMI panels. PM Designer and PanelMaster are trademarks of Cermate Technologies Inc.
Text and figures are the manufacturer's and may describe features your panel or software version does not have. For a plain-language introduction read the PM Designer guide; for help with a specific panel contact TSL Automation.