
Section 16.2.1 · Chapter 16: Schedule
Schedule - General Settings
This section describes how to define the general settings for schedule. The following is an example of the General page of the Schedule dialog box.
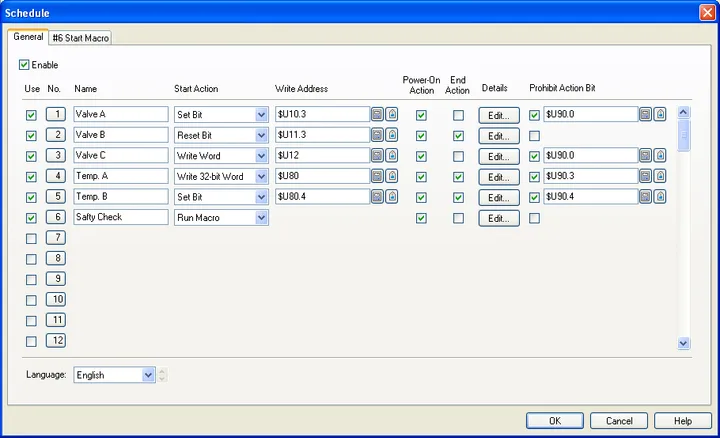
To enable the schedule function for the application, check the Enable box in the dialog box.
The following describes how to set up a time schedule.
|
Item |
Description | ||||||||||||
|---|---|---|---|---|---|---|---|---|---|---|---|---|---|
| Use | To register the schedule, check the Use box of the schedule first. During project development, you can un-register the schedule temporarily by un-checking the Use box. The entered settings will not be lost after un-checking. | ||||||||||||
| No. | The pre-assigned identifier of the schedule. | ||||||||||||
| Name | Specify the schedule name for each language. The schedule name will be shown on the Schedule Setting Table screen object. The maximum length of a schedule name is 24 characters. To select the language you are working on, use the Language combo box on the bottom of the dialog box. | ||||||||||||
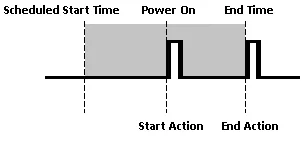
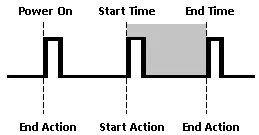
| Start Action |
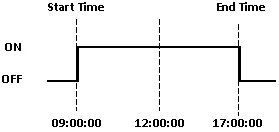
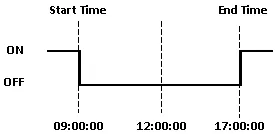
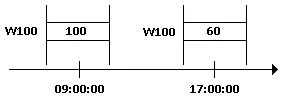
Specify the action you want the HMI to perform at the
Start time and the End time. The following table
describes the five options.
|
||||||||||||
| Write Address |
Specify the target address for the desired action.
|
||||||||||||
| Power-On Action |
Select the action to perform when the power is turned
on.
|
||||||||||||
| End Action |
Check the item to enable the End Action. If the End
Action is enabled, the HMI will do one of the following
operations at the designated End Time according to the
selected Start Action.
|
||||||||||||
| Details | Click the Edit button to open the Schedule Details dialog box. You can specify the Start Time, End Time, Start Value, and End Value of the schedule in the Schedule Details dialog box. See Section 16.2.2 for details. | ||||||||||||
| Prohibit Action Bit | Select to prohibit the schedule function by using the specified Prohibit Action Bit. At the Start Time, the value of the Prohibit Action Bit is read before the start action is performed. If the value is on, the schedule action is not performed for the current cycle. |
Need PM Designer itself?
V4 for current PK, PT, ITV and PM panels, V2 for older models. Free, sent by email.
Source.Section 16.2.1 of the PM Designer Software User Manual, Edition 2.0, © Cermate Technologies Inc. (www.cermate.com, service@cermate.com). Reproduced online, with the manual's own figures, by TSL Automation Solutions, authorised Cermate distributor, for users of Cermate HMI panels. PM Designer and PanelMaster are trademarks of Cermate Technologies Inc.
Text and figures are the manufacturer's and may describe features your panel or software version does not have. For a plain-language introduction read the PM Designer guide; for help with a specific panel contact TSL Automation.