
Section 16.3.1 · Chapter 16: Schedule
Schedule Setting Table - Basic Operations
You can display a list of schedules by using the schedule setting table. And the operators are allowed to change the time range of a schedule with the Schedule Setting Table at runtime.
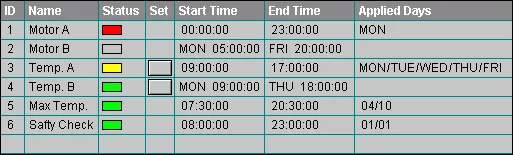
The above is an example of the schedule setting table. The first row is the title row. It displays the title of each column. The other rows display one schedule per row. You can create scroll button groups or scroll bars to scroll the contents. A schedule setting table can have seven columns. The following table describes the content of each column for a schedule setting table.
|
Column |
Description |
|---|---|
| Schedule No. | The number of the associated schedule. This column is optional. |
| Schedule Name | The name of the associated schedule. |
| Status | The current status of the associated schedule. The status includes: Active, Inactive, Prohibited, Error. |
| Set |
If the associated schedule is changeable, there is a
button shown in the column. Click the button, you will
see the following sample Set Schedule dialog that allows
the operator to change the time range of the associated
schedule.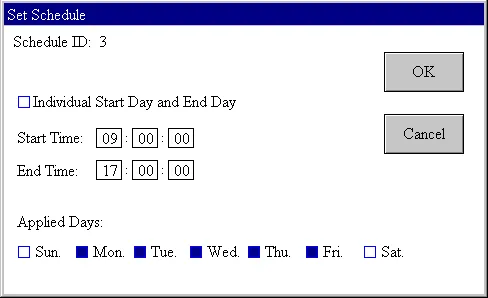
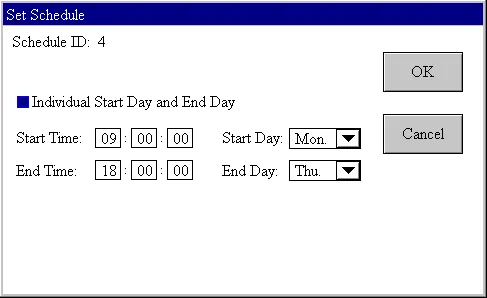 To set the dialog, please see Section 16.2.2 for details. |
| Start Time | The start time of the schedule. |
| End Time | The end time of the schedule. |
| Applied Days | The day or days in a week that the schedule will apply. |
The text color and font of a row are determined by the settings in the General Page.
Need PM Designer itself?
V4 for current PK, PT, ITV and PM panels, V2 for older models. Free, sent by email.
Source.Section 16.3.1 of the PM Designer Software User Manual, Edition 2.0, © Cermate Technologies Inc. (www.cermate.com, service@cermate.com). Reproduced online, with the manual's own figures, by TSL Automation Solutions, authorised Cermate distributor, for users of Cermate HMI panels. PM Designer and PanelMaster are trademarks of Cermate Technologies Inc.
Text and figures are the manufacturer's and may describe features your panel or software version does not have. For a plain-language introduction read the PM Designer guide; for help with a specific panel contact TSL Automation.