
Section 5.4.1 · Chapter 5: Buttons and Switches
Function Button - Basic Operations
A function button can be configured to perform the following operations:
|
Category |
Operation | Description | |
|---|---|---|---|
| Setting up Panel | Increase Brightness/Contrast | Increases either the brightness or the contrast of the display depending on the target panel. Not all target panels support this operation. Check the hardware manual for details. | |
| Decrease Brightness/Contrast | Decreases either the brightness or the contrast of the display depending on the target panel. Not all target panels support this operation. Check the hardware manual for details. | ||
| Save Brightness/Contrast | Saves the setting of either the brightness or the contrast of the display depending on the target panel. Not all target panels support this operation. Check the hardware manual for details. | ||
| Enter Panel Setup Mode | Exits the application and enters the panel setup mode. | ||
| Start Transparent Communication | Starts the transparent communication. | ||
| End Transparent Communication | Ends the transparent communication. | ||
| Show Real Time Clock | Displays the settings of the Real Time Clock so you can change the settings. | ||
| Turn Backlight Off | Turns off the backlight of the display. To turn on the backlight, touch the screen. Not all target panels support this operation. Check the hardware manual for details. | ||
| Turn Off Buzzer Response | Turns off the buzzer if it becomes annoyed while working on the touch panel. | ||
| Turn On Buzzer Response | Turns on the buzzer as a reminder when you perform an action such as pressing the button. | ||
| Format Built-in Flash Disk | Format the built-in flash disk (C:). This operation requires a user level of 8 or higher. | ||
| Calibrate Touch Panel | Allows the operator to calibrate the touch panel without entering Panel Setup. | ||
| Setting up Application | Log In | Displays the password keypad so you can enter a password to change the current user level. | |
| Log Out | Changes the current user level to 0. | ||
| Show Password Table | Displays the password table so you can change the passwords. The password table only lists the passwords whose user level is equal to or less than the current user level. | ||
| Acknowledge Alarm |
Acknowledges multiple alarms of the screen that the
button is located at a time. You can select to
acknowledge The associated alarm, Level 1 alarms, Level
1-2 alarms, Level 1-3 alarms, Level 1-4 alarms, Level
1-5 alarms, Level 1-6 alarms, Level 1-7 alarms, or All
alarms.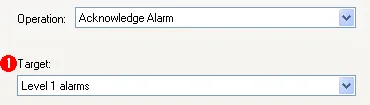 |
||
| Change Language |
Change the current language to the specified language.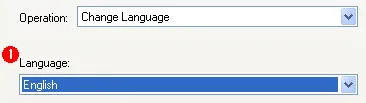 |
||
| Show Folder Selection Box |
Displays the Folder Selection box and saves the
result into pathname buffer.
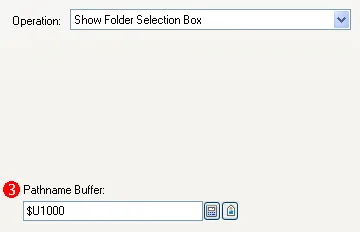 |
||
| Show File Selection Box |
Displays the File Selection box for the specified
purpose.
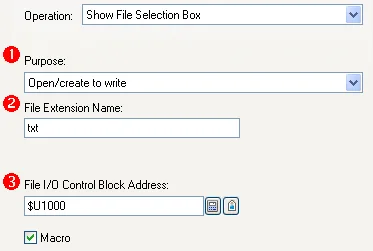
The following table lists the five purposes: |
||
| Purpose | Description | ||
| Open to Read | Open the specified file for reading. The file must exist.* | ||
| Open/create to Write | Open the specified file for reading. A new file is created when the specified file does not exist. If the specified file exists, it will be over written.* | ||
| Open/create to Append | Open the specified file for appending data. A new file is created when the specified file does not exist.* | ||
| Delete | Delete the specified file. | ||
| Rename | Rename the specified file. | ||
|
You can specify the File Extension Name that will limit
the File Selection Box to list only the files of the
specified type. The specified extension name can only
have ASCII characters and at most 3 characters. Note: * You need to specify the File I/O Control Block Address, an internal variable that receives the result of the file open operation. You can specify a macro that will run when the specified file is opened successfully. It is important to close an opened file with the macro command CLOSE_FILE when you finish the operation, or the file data will be lost. |
|||
| Saving Data to File | Save Recipe Data To File | Saves the data of the specified recipe block in a text file. The file can be read by any text editor, Microsoft Excel, and the target panel. Note that the current language's data item names are used as the column names. | |
| Save Recipe Data (.prd file) | Saves the data of the specified recipe block in a file using the PRD format. The file can be read by the Recipe Editor and the target panel. | ||
| Save Logged Data To File |
Saves the data collected by the specified data logger in
a text file. The file can be read by any text editor,
Microsoft Excel, and the target panel.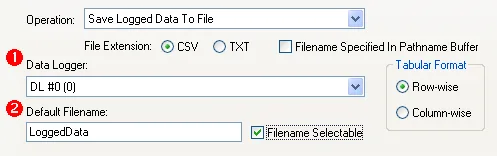 |
||
| Save Logged Data (.ldf file) | Saves the data collected by the specified data logger in an LDF file. The file can be read by the target panel only. | ||
| Save Alarm History To File | Saves the alarm history in a text file. The file can be read by any text editor, Microsoft Excel, and the target panel. | ||
| Save Alarm Counts To File | Saves the alarm counts in a text file. The file can be read by any text editor, Microsoft Excel, and the target panel. | ||
| Save Operation History To File | Saves the operation history in a text file. The file can be read by any text editor, Microsoft Excel, and the target panel. | ||
| Save Line Chart Data To File | Saves the data collected by the specified line chart in a text file. The file can be read by any text editor, Microsoft Excel, and the target panel. | ||
| Save Scatter Chart Data To File | Saves the data collected by the specified scatter chart in a text file. The file can be read by any text editor, Microsoft Excel, and the target panel. | ||
| Save Application Configuration Data (.plf file) | Saves the application configuration data that was downloaded to the target panel previously in a PLF file. The file can be used by the software. | ||
| Save System and Application to File (.prp file) | Saves the system programs and the application runtime data in a PRP file. The file can be used by the software and compatible target panels. | ||
| Eject Micro SD Card Safely | To assure all the file operations concerning the micro SD card are done before removing it from the HMI unit, it is recommended that the operator presses a function button with the operation Eject Micro SD Card Safely when the operator intends to remove the card. The operator is allowed to remove the card after the message "Safe to remove micro SD card" is displayed. | ||
| Eject USB Memory Stick Safely | To assure all the file operations concerning the USB memory stick are done before removing it from the HMI unit, it is recommended that the operator presses a function button with the operation Eject USB Memory Stick Safely when the operator intends to remove the memory stick. The operator is allowed to remove the memory stick after the message "Safe to remove USB memory stick" is displayed. | ||
| Loading Data from File | Load Recipe Data From File | Loads the data of the specified recipe block from a text file. | |
| Load Recipe Data (.prd file) |
Loads the data of the specified recipe block from a PRD
file.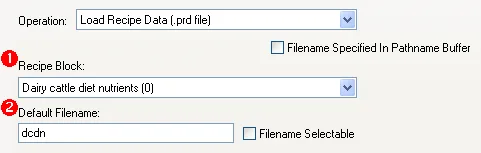 |
||
| Load Logged Data From File |
Loads the data of the specified data logger from a text
file (.txt file) or an excel file (.csv file).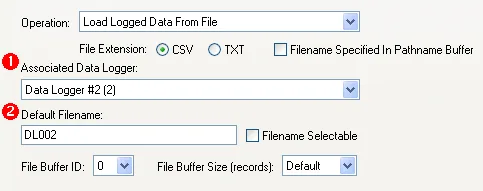 |
||
| Load Logged Data (.ldf file) |
Loads the data of the specified data logger from a LDF
file.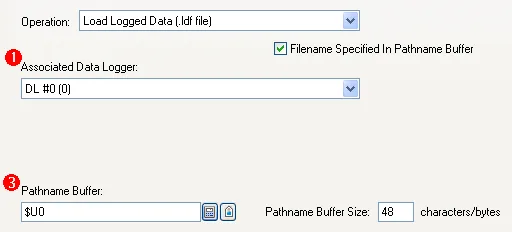 |
||
| Load Line Chart Data From File |
Loads the data of the specified line chart from a text
file.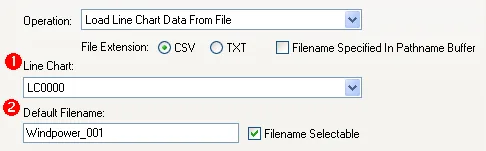 |
||
| Load Scatter Chart Data From File |
Loads the data of the specified scatter chart from a
text file.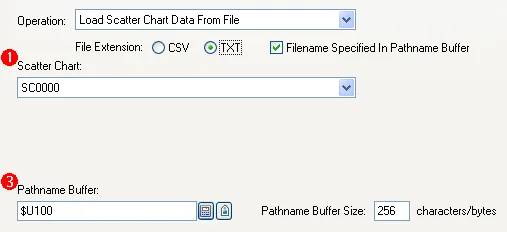 |
||
| Load Logged Alarms From File |
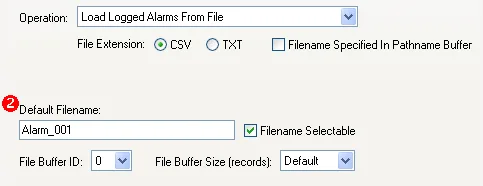 |
||
| Transferring Data | Write Recipe to Controller | Writes the current recipe, which is determined by the current recipe block and the current recipe number, to the specified controller. The controller and the destination address are specified in the settings of the recipe block. | |
| Read Recipe from Controller | Updates the current recipe, which is determined by the current recipe block and the current recipe number, by reading a recipe from the specified controller. The controller and the source address are specified in the settings of the recipe block. | ||
| Save Recipe Data to Flash ROM | Saves the data of the specified recipe block to the target panel’s flash ROM. The option “Need space in flash ROM to save backup” must be selected in the settings of the recipe block to make this operation available. | ||
| Load Recipe Data from Flash ROM | Loads the data of the specified recipe block from the target panel’s flash ROM. The option “Need space in flash ROM to save backup” must be selected in the settings of the recipe block to make this operation available. | ||
| Printing Screen | Print Screen | Prints the screen where the button is located. The printed area is specified in the settings of the screen properties. | |
| Print Screen to File (256-color .bmp) | Prints the screen where the button is located to a file with the BMP format of 256 colors. The printed area is specified in the settings of the screen properties. | ||
| Print Screen to File (64K-color .bmp) | Prints the screen where the button is located to a file with the BMP format of 64K colors. The printed area is specified in the settings of the screen properties. | ||
| Print Screen to File (True-color.bmp) | Prints the screen where the button is located to a file with the BMP format. The color resolution is the same as the target panel’s display. The printed area is specified in the settings of the screen properties. | ||
| Print Screen to File (.jpg) |
Prints the screen where the button is located to a file
with the JPG format. The printed area is specified in
the settings of the screen properties.
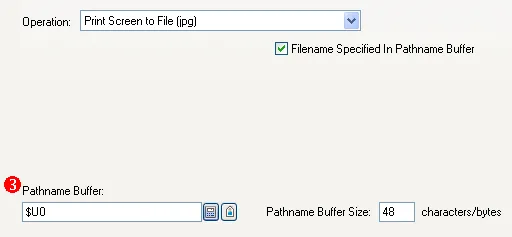 |
||
| Clearing Data | Clear Logged Data |
Clears the data of the specified data logger.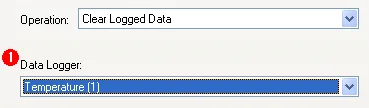 |
|
| Clear Logged Data (All) | Clears the data of all the data loggers. | ||
| Clear Alarm History |
Clears the alarm history.
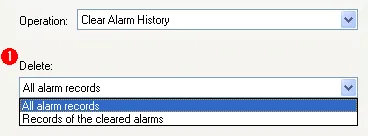 |
||
| Clear Alarm Counts | Resets the alarm counts to 0. | ||
| Clear Operation History | Clears the operation history. | ||
| Running Application | Restart Application | Restarts the application. | |
| Update System and Application From File (.prp) | Updates the system programs and the application runtime data from a PRP file. The original system programs and the application runtime data are replaced by the new ones. | ||
| Stop Running | Exists the application. | ||
| Stop Operation Safely | Stops the HMI operation before turning the power off and it guarantees that all operations with the non-volatile storage devices are safely completed. Please see 3.1.5 Avoiding Data Corruption Due To Random Power-off for details. | ||
| Boot from File (.prp) | Loads-and-runs the system programs and the application runtime data from a PRP file. The original system programs and runtime data remain intact. The loaded system programs and the runtime data will be lost after power off. | ||
| Multimedia | Play Sound |
Plays the specified sound file.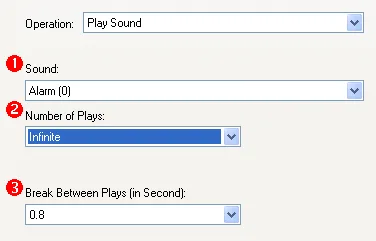 |
|
| Stop Playing Sound | Stops playing the current sound file. | ||
| Take Picture | Takes a picture with the specified USB camera. | ||
| Select Video | Selects a video with specified video channel ID. | ||
| View Video | Views the video in the associated camera view object. | ||
| Freeze Video | Freezes the video showing in the associated camera view object. | ||
| Save Frozen Picture |
Saves the frozen picture of the video showing in the
associated camera view object to the jpg file.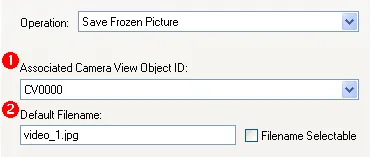 |
||
| Load JPEG Picture |
Loads JPEG picture and displays it in the associated
picture display object. The state type of the picture
display object must be "Display a picture loaded by an
associated function button".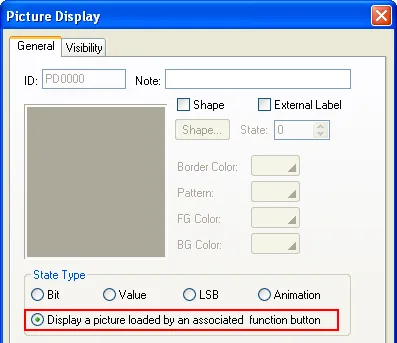
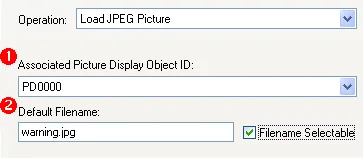 |
||
| Adjusting Viewing Range | Zoom In |
Makes the viewing range of the associated object half
the size so the object shows less content but with more
detail.
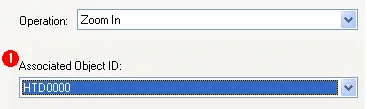 |
|
| Zoom Out | Makes the viewing range of the associated object twice the size so the object shows more content but with less detail. | ||
| Restore to Normal View | Restores the viewing range to the original setting. | ||
| Zoom All | Allows to automatically zoom in or out the view to show all the collected data altogether in the display area of the associated object such as historic trend graph. | ||
| Scrolling Content | Scroll Left | Scrolls the content displayed by the associated object to the left. | |
| Scroll Right | Scrolls the content displayed by the associated object to the right. | ||
| Scroll Up | Scrolls the content displayed by the associated object to the top. | ||
| Scroll Down |
Scrolls the content displayed by the associated object
to the bottom.
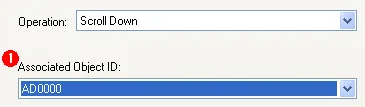 |
||
| Scroll Page Left | Scrolls the content displayed by the associated object to the left by a page. | ||
| Scroll Page Right | Scrolls the content displayed by the associated object to the right by a page. | ||
| Scroll Page Up | Scrolls the content displayed by the associated object to the top by a page. | ||
| Scroll Page Down | Scrolls the content displayed by the associated object to the bottom by a page. | ||
| Scroll to Left End | Scrolls the content displayed by the associated object to the left end. | ||
| Scroll to Right End | Scrolls the content displayed by the associated object to the right end. | ||
| Scroll to Bottom End | Scrolls the content displayed by the associated object to the bottom end. | ||
| Scroll to Top End | Scrolls the content displayed by the associated object to the top end. | ||
| Changing Data | Select Date | Selects date and shows the value of the associated object on that date. | |
| Select Date And Time |
Selects date/time and shows the value of the associated
object on that time.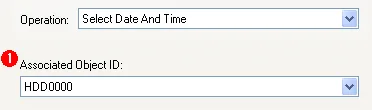 |
||
| Select Next Data Entry Object | Selects the next data entry object on the screen where the button is on. | ||
| Select Previous Data Entry Object | Selects the previous data entry object on the screen where the button is on. | ||
| Increase Value by One |
Activates the selected data entry object to set its
specified variable to the value obtained by increasing
the value of its monitored variable by one. The operation is available for multi-state buttons whose property “Activation” is set to “Indirect”. The operation is available for numeric entries whose property “Data Entry” is set to “On-screen Keypad and/or Function Keys”. |
||
| Decrease Value by One |
Activates the selected data entry object to set its
specified variable to the value obtained by decreasing
the value of its monitored variable by one. The operation is available for multi-state buttons whose property “Activation” is set to “Indirect”. The operation is available for numeric entries whose property “Data Entry” is set to “On-screen Keypad and/or Function Keys”. |
||
| File Operation | Copy File |
The Copy File operation of function buttons supports: 1) Copy a selected file with the specified extension name. 2) Copy all the files with the specified extension name under a selected folder. Perform either 1) or 2) chosen at runtime. |
|
| Delete File |
The Delete File
operation of function buttons supports: 1) Delete a selected file with the specified extension name. 2) Delete all the files with the specified extension name under a selected folder. Perform either 1) or 2) chosen at runtime. 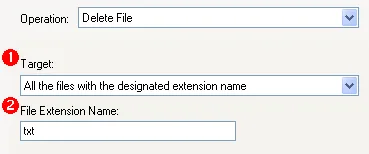 |
||
| Make File Folder | Makes a new file folder. | ||
| Tools | Run .EXE Program |
Runs the .exe program.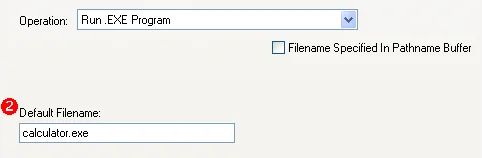 |
|
| Calculator | Runs a simple calculator. | ||
Need PM Designer itself?
V4 for current PK, PT, ITV and PM panels, V2 for older models. Free, sent by email.
Source.Section 5.4.1 of the PM Designer Software User Manual, Edition 2.0, © Cermate Technologies Inc. (www.cermate.com, service@cermate.com). Reproduced online, with the manual's own figures, by TSL Automation Solutions, authorised Cermate distributor, for users of Cermate HMI panels. PM Designer and PanelMaster are trademarks of Cermate Technologies Inc.
Text and figures are the manufacturer's and may describe features your panel or software version does not have. For a plain-language introduction read the PM Designer guide; for help with a specific panel contact TSL Automation.