
Section 9.1.4 · Chapter 9: Animated Objects
Pipeline - General Settings
This section describes how to define the general settings for the pipelines. The following is an example of the General page of the Pipeline property sheet.
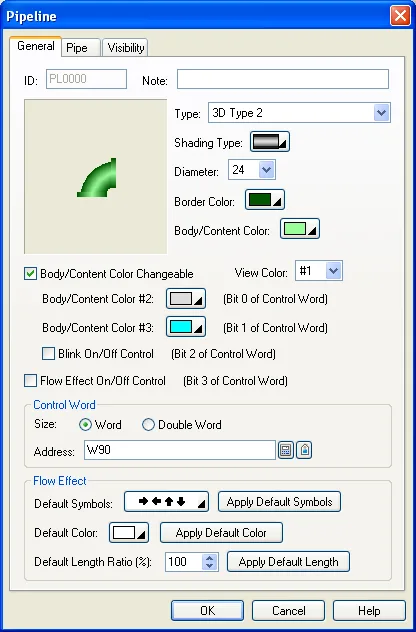
The following table describes each property in the General page.
|
Property |
Description | ||
|---|---|---|---|
| ID | The object’s identifier. It is generated when the object is created. The identifier is unique within the screen where the object is located. The format of the IDs for the pipelines is PLnnnn. | ||
| Note | You can type a note for the object. | ||
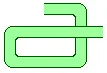
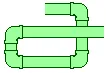
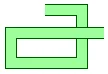
| Type | The type of the pipeline. There are five types available: | ||
| Type | Example | ||
| 2D Type 1 |
 |
||
| 2D Type 2 |
 |
||
| 2D Type 3 |
 |
||
| 3D Type 1 |
 |
||
| 3D Type 2 |
 |
||
| Shading |
Select a shading method when the
Type is “3D Type 1” or “3D Type
2”. There are three shading
methods available:
 |
||
| Diameter | Specifies the diameter of the pipeline. | ||
| Border Color | Specifies the border color of the pipeline. | ||
| Body/Content Color | Specifies the body or content color of the pipeline. | ||
| Flow Effect On/Off Control | Check this option if you want to enable or disable the flow effect for the pipeline at runtime. The flow effect will be enabled when bit 3 of the control word is on. | ||
| Body/Content Color Changeable | <Check Box> | Check this option if you want to control the body/content color of the pipeline at runtime. The variable that controls the pipeline is called the control word and is specified in the Address field. | |
| View Color | Select a color so you can view the pipeline painted with that color. | ||
| View Color | Painted With | ||
| 1 | Body/Content Color | ||
| 2 | Body/Content Color #2 | ||
| 3 | Body/Content Color #3 | ||
| Body/Content Color #2 | Select a color as the second body/content color for the pipeline. This color will be used to paint the pipeline when bit 0 of the control word is on. | ||
| Body/Content Color #3 | Select a color as the third body/content color for the pipeline. This color will be used to paint the pipeline when bit 1 of the control word is on. | ||
| Blink On/Off Control | Check this option if you want the pipeline to blink at runtime. The pipeline will blink when bit 2 of the control word is on. | ||
| Control Word | Size | Select Word or Double Word for the size of the control word. | |
| Address |
Specifies the variable that
controls the pipeline. Click  to enter an address for this
field. Click  to select a tag for this field. The following table shows the bit assignment data of the variable: |
||
| Bit | Assignment | ||
| 0 | Shows body/content color #2 when this bit is on | ||
| 1 | Shows body/content color #3 when this bit is on | ||
| 2 | Blinks when this bit is on | ||
| 3 | Shows the flow effect when this bit is on | ||
| Flow Effect | Default Symbols |
Select a set of symbols as the
default symbols for the flow
effect. There are 14 available
sets: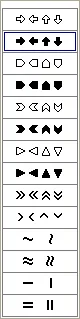 Click  to make all pipes of the
pipeline use the default symbols
for the flow effect. |
|
| Default Color |
Select a color as the default
color for the flow symbols. Click  to make all pipes of the
pipeline use the default color
for the flow symbols. |
||
| Default Length Ratio(%) |
Specifies the length ratio
between pipe and flow effect as
the default length ratio. Click  to make all pipes of the
pipeline use the default length
ratio for the flow effect. |
||
Need PM Designer itself?
V4 for current PK, PT, ITV and PM panels, V2 for older models. Free, sent by email.
Source.Section 9.1.4 of the PM Designer Software User Manual, Edition 2.0, © Cermate Technologies Inc. (www.cermate.com, service@cermate.com). Reproduced online, with the manual's own figures, by TSL Automation Solutions, authorised Cermate distributor, for users of Cermate HMI panels. PM Designer and PanelMaster are trademarks of Cermate Technologies Inc.
Text and figures are the manufacturer's and may describe features your panel or software version does not have. For a plain-language introduction read the PM Designer guide; for help with a specific panel contact TSL Automation.