
Section 9.6.3.1 · Chapter 9: Animated Objects
Using Object Group for Animated Graphics
You can use an object group for the animated graphic.
To create an object group, you can first group the selected objects and then
save the group into the object library.
To use the object group, you can click
 the
button in the Picture page to bring up the Copy Object from Object Library
dialog box. In the dialog, you can select an existing object group for the
animated graphic.
Any modifications such as moving the group, resizing the group, deleting the
group etc. will be applied to the objects of the group at the same time.
However, each object in the group can have its own properties. You can double
click
 the icon to bring up the properties dialog box of the corresponding object and
then define the settings of each object.
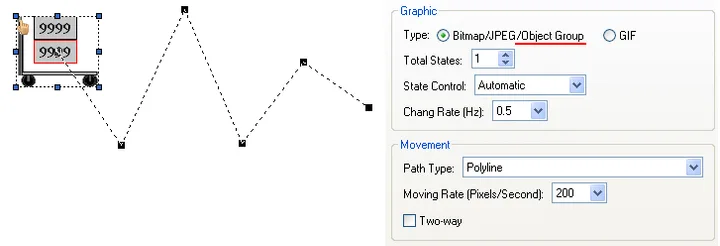
The following is an example showing you how to edit the object group for the
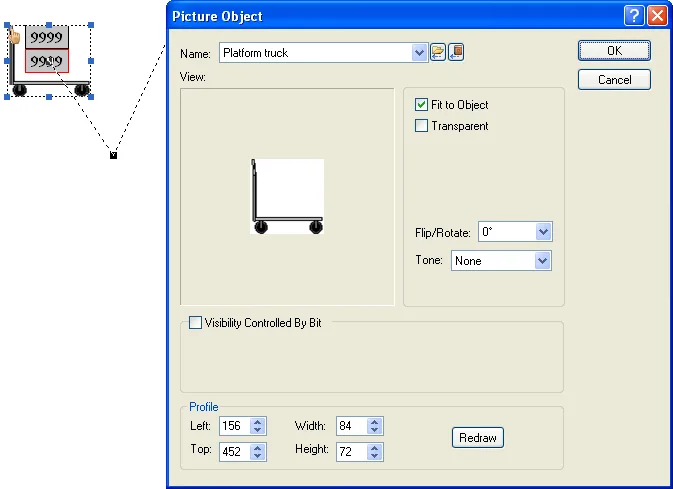
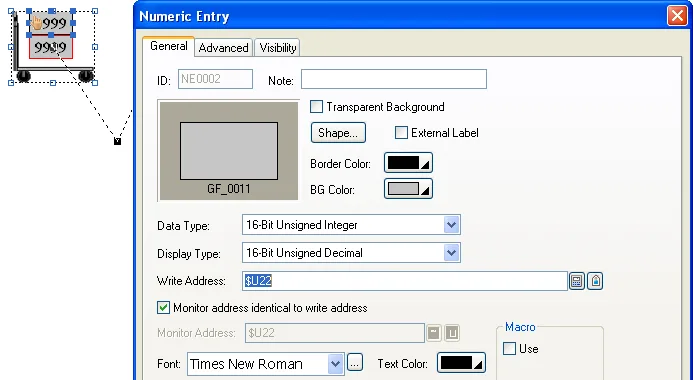
animated graphic. The object group includes a numeric entry, a numeric display
and a picture object. They will move along the set of connected lines. At the
same time, the value of numeric entry and the numeric display will change.
1. Set up the animated graphic with the object group as its graphic.
2. Set up the picture object
3. Set up the numeric entry
Need PM Designer itself?
V4 for current PK, PT, ITV and PM panels, V2 for older models. Free, sent by email.
Source.Section 9.6.3.1 of the PM Designer Software User Manual, Edition 2.0, © Cermate Technologies Inc. (www.cermate.com, service@cermate.com). Reproduced online, with the manual's own figures, by TSL Automation Solutions, authorised Cermate distributor, for users of Cermate HMI panels. PM Designer and PanelMaster are trademarks of Cermate Technologies Inc.
Text and figures are the manufacturer's and may describe features your panel or software version does not have. For a plain-language introduction read the PM Designer guide; for help with a specific panel contact TSL Automation.