
Section 4.1.1 · Chapter 4: Designing Screens
Drawing Dots
- In the Draw menu or Draw toolbar, click Dot
 .
- Move the cursor onto the screen where you want to draw a dot. A dot with default settings will display and move along with the cursor.
- Click the desired position on the screen to place the dot. The center of the dot will be at the clicked position.
- Double-click the dot to bring up the Dot dialog box and then modify the settings of the dot.
The following is an example of the Dot dialog box.
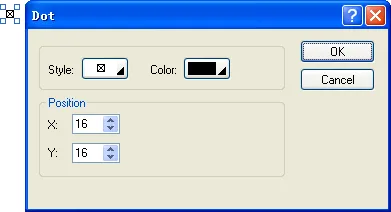
The following table describes each item in the General page.
|
Item |
Description | |
|---|---|---|
| Style |
Select one of the dot styles listed below: 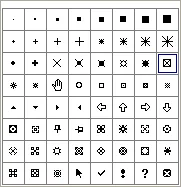 |
|
| Color | Specifies the dot color. | |
| Position | X | Specifies the X coordinate of the upper-left corner of the dot. |
| Y | Specifies the Y coordinate of the upper-left corner of the dot. | |
- You can click the following icons in the Draw toolbar to modify the properties of the dot.
|
Click Icon |
To |
|---|---|
 |
Select a style for the dot. |
 |
Select a color for the dot. |
Need PM Designer itself?
V4 for current PK, PT, ITV and PM panels, V2 for older models. Free, sent by email.
Source.Section 4.1.1 of the PM Designer Software User Manual, Edition 2.0, © Cermate Technologies Inc. (www.cermate.com, service@cermate.com). Reproduced online, with the manual's own figures, by TSL Automation Solutions, authorised Cermate distributor, for users of Cermate HMI panels. PM Designer and PanelMaster are trademarks of Cermate Technologies Inc.
Text and figures are the manufacturer's and may describe features your panel or software version does not have. For a plain-language introduction read the PM Designer guide; for help with a specific panel contact TSL Automation.