
Section 4.1.12 · Chapter 4: Designing Screens
Drawing Scales
- In the Draw menu or Draw toolbar, click Scale
 .
- Move the cursor onto the screen where you want to draw a scale. A scale with default settings will display and move along with the cursor.
- Click the desired position on the screen to place the scale. The upper-left corner of the bounding box of the scale will be at the clicked position.
- Double-click the scale to bring up the Scale dialog box and then define the settings for the scale. The following is an example of the Scale dialog box. The corresponding scale is shown to the right of the dialog box.
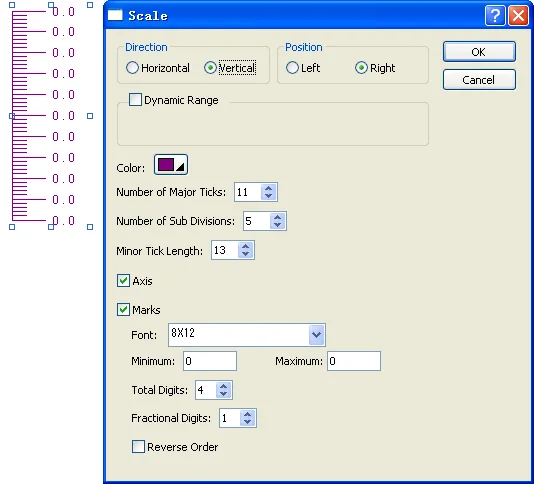
The following table describes each property in the Scale dialog box.
|
Property |
Description | |||||
|---|---|---|---|---|---|---|
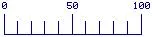
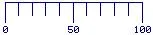
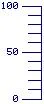
| Direction and Position | Select the direction and the position of the scale. | |||||
| Direction | Horizontal | Vertical | ||||
| Position | Top | Bottom | Left | Right | ||
| Example |
 |
 |
 |
 |
||
| Dynamic Range | Dynamic Range | Check this item if you want the numbers of the scale ticks and the range of the scale marks to be dynamic, i.e. to be controlled by the specified variable. | ||||
| Parameter Block | Specifies the variable that controls the numbers of the scale ticks and the range of the scale marks. The variable is an array of four double-words (8 words). The following table describes the data members of the array. | |||||
| Word # | Data Type | Description | ||||
| 0, 1 | 32-bit unsigned integer | The number of major ticks. The allowable range of this number is between 2 and 101. | ||||
| 2, 3 | 32-bit unsigned integer | The number of divisions between two adjacent major ticks. The allowable range of this number is between 1 and 100. | ||||
| 4, 5 | 32-bit signed integer | The minimum of the scale marks. | ||||
| 6, 7 | 32-bit signed integer | The maximum of the scale marks. | ||||
|
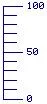
Example Assume a scale’s dynamic range control block is $U100. The following macro commands makes the scale look like this: $U100 = 3 (UD) // The number of major ticks. $U102 = 5 (UD) // The number of sub-divisions. $U104 = 0 (SD) // The minimum of the scale marks. $U106 = 100 (SD) // The maximum of the scale marks. |
||||||
| Color | The color of the scale. To specify the color, click the corresponding Color icon and select a color from the Color palette. | |||||
| Number of Major Ticks | The number of major ticks. The minimum you can specify is two. | |||||
| Number of Sub Divisions | The number of divisions between two adjacent major ticks. The minimum you can specify is one. | |||||
| Minor Tick Length | The length of minor ticks. | |||||
| Axis | Check this item if you want the scale to have an axis. | |||||
| Marks | Marks | Check this option if you want the scale to have marks. | ||||
| Font | The font of the marks. | |||||
| Minimum | The minimum of the marks. It is a 32-bit integer. | |||||
| Maximum | The maximum of the marks. It is a 32-bit integer. | |||||
| Total Digits | The total digits to be displayed for the marks. | |||||
| Fractional Digits | The number of fractional digits for the marks. For example, when the Maximum is 5000, the Total Digits is 4, and the Fractional Digits is 2, the mark for the Maximum will be 50.00. | |||||
| Reverse Order | Check this option if you want the marks of the scale to show in reverse order. In normal order, the maximal mark is at the right end or top end of the scale. In reverse order, the maximal mark is at the left end or bottom end of the scale. | |||||
Need PM Designer itself?
V4 for current PK, PT, ITV and PM panels, V2 for older models. Free, sent by email.
Source.Section 4.1.12 of the PM Designer Software User Manual, Edition 2.0, © Cermate Technologies Inc. (www.cermate.com, service@cermate.com). Reproduced online, with the manual's own figures, by TSL Automation Solutions, authorised Cermate distributor, for users of Cermate HMI panels. PM Designer and PanelMaster are trademarks of Cermate Technologies Inc.
Text and figures are the manufacturer's and may describe features your panel or software version does not have. For a plain-language introduction read the PM Designer guide; for help with a specific panel contact TSL Automation.