
Section 3.9.2 · Chapter 3: Creating Panel Applications
Creating and Opening Screens
■ Creating Screens
To create a screen, you can do the following:
- Do one of the following:
* On the Screen menu, click New Screen…
* In the Project Manager window, right-click the panel application > Screens item and then click New Screen… on the pop-up menu. - In the New Screen dialog box, type the name and number desired, and hit the ENTER key or click the OK button to validate your choice. The following is an example of the New Screen dialog box.
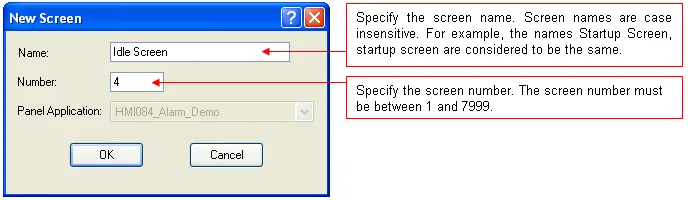
Note: In each panel application, both the screen name and the screen number have to be unique.
■ Opening Screens
To open a screen, you can do the following:
-
In the Project Manager window, double click the screen you want to open
-
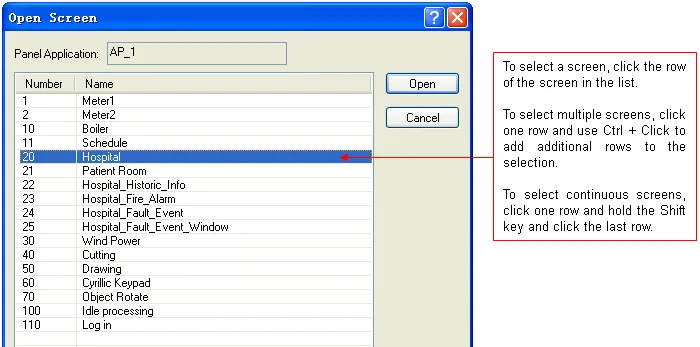
On the Screen menu, click Open Screen… In the Open Screen dialog box, select one or multiple screens and click Open button to open all the selected screens. The following is an example of Open Screen dialog box.
■ Activating Screens after Opening
To uncover any screen that is partially or completely obscured by other screens, you can do the following:
- In the Project Manager window, double click the screen which is not at the top.
- On the Window menu, click the screen you need to activate. Or click Windows… to bring out the Windows dialog box. In the Windows dialog box, select the screen and then click Activate button.
- Click anywhere on the screen. If the screens are maximized, click on the title tab of the screen.
Need PM Designer itself?
V4 for current PK, PT, ITV and PM panels, V2 for older models. Free, sent by email.
Source.Section 3.9.2 of the PM Designer Software User Manual, Edition 2.0, © Cermate Technologies Inc. (www.cermate.com, service@cermate.com). Reproduced online, with the manual's own figures, by TSL Automation Solutions, authorised Cermate distributor, for users of Cermate HMI panels. PM Designer and PanelMaster are trademarks of Cermate Technologies Inc.
Text and figures are the manufacturer's and may describe features your panel or software version does not have. For a plain-language introduction read the PM Designer guide; for help with a specific panel contact TSL Automation.