
Section 3.1.4 · Chapter 3: Creating Panel Applications
Specifying Default Folder for File I/O
The default folder will be used for a file I/O operation when one of the following three conditions exists:
- The command issued for the operation does not require a specific filename.
- The command issued for the operation requires a filename and the specified filename contains no path information.
- The [Save to the default folder] option is checked when you want to save logged data / alarm history / operation log to file. Please see Section 13.1.2, Section 12.2, Section 14.2 for details about option setting.
To specify the default folder, access the "Custom" page of the “Panel General Setup” dialog box. Select "General Setup" and "Panel" in the submenu to get the dialog box, then click the "Custom" tab. Another way to access the dialog box is to double-click the "Panel General Setup" node on the project tree.
On the “Custom” page, you can specify the desired default folder in the "Default Folder" group according to the following rules:
- If you want the folder of your application file (.pe3 or .pl3 file) to be the default folder, select “Use the application file's folder” in the “Creation” combo box.
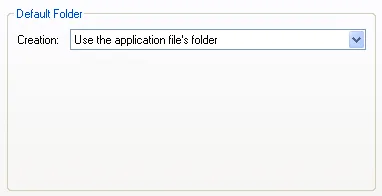
For applications with this selection running on HMI units, because the applications are not stored in any file or under any directory, the root directory of the USB memory stick will be used as the default folder instead.
-
If you want to use a specific folder that will exist at run-time as the default folder, select "Create the designated folder" in the "Creation" combo box and specify the folder in the "Designated Folder" edit box.
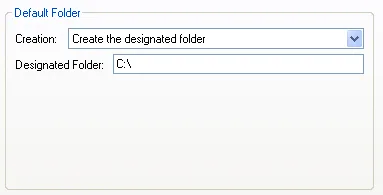
Note that the specified folder must exist at run-time or the file I/O operations will fail.
-
If your application needs a new default folder every day, select “Create a new folder every day” in the “Creation” combo box, and specify the following 3 items:
A) New Folder Path: The path for the new folder. The system will
create a new default folder under the specified path every day.
B) Folder Name Format: The format to create a default folder name.
C) <Prefix>: The string to be used as the prefix of the new default folder
names. Note that only ASCII characters are allowed.
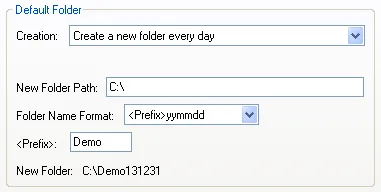
Example:
|
Folder Name Format |
Folder Path | <Prefix> | Date | Default Folder Name |
|---|---|---|---|---|
| <Prefix>yymmdd | C: | ABC | December 19, 2008 | C:\ABC081219 |
| <Prefix>yyyymmdd | D:\NEO | ABC_ | December 19, 2008 | D:\NEO\ABC_20081219 |
| <Prefix>yyMMMdd | C: | XYZ | January 10, 2009 | C:\XYZ09JAN10 |
| <Prefix>yyyyMMMdd | D:\123 | XYZ_ | January 10, 2009 | D:\123\XYZ_2009JAN10 |
-
If your application needs a new default folder every month, select “Create a new folder every month” in the “Creation” combo box and specify the following 3 items:
A) New Folder Path: The path for
the new folder. The system will create a new default folder under the specified
path every month.
B) Folder Name Format: The format to create a
default folder name.
C) <Prefix>: The string to be used as the prefix
of the new default folder names. Note that only ASCII characters are allowed.
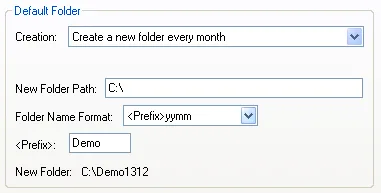
Example:
|
Folder Name Format |
Folder Path | <Prefix> | Date | Default Folder Name |
|---|---|---|---|---|
| <Prefix>yymm | C: | ABC | December 19, 2008 | C:\ABC0812 |
| <Prefix>yyyymm | D:\NEO | ABC_ | December 19, 2008 | D:\NEO\ABC_200812 |
| <Prefix>yyMMM | C: | XYZ | January 10, 2009 | C:\XYZ09JAN |
| <Prefix>yyyyMMM | D:\123 | XYZ_ | January 10, 2009 | D:\123\XYZ_2009JAN |
Need PM Designer itself?
V4 for current PK, PT, ITV and PM panels, V2 for older models. Free, sent by email.
Source.Section 3.1.4 of the PM Designer Software User Manual, Edition 2.0, © Cermate Technologies Inc. (www.cermate.com, service@cermate.com). Reproduced online, with the manual's own figures, by TSL Automation Solutions, authorised Cermate distributor, for users of Cermate HMI panels. PM Designer and PanelMaster are trademarks of Cermate Technologies Inc.
Text and figures are the manufacturer's and may describe features your panel or software version does not have. For a plain-language introduction read the PM Designer guide; for help with a specific panel contact TSL Automation.