
Section 3.9.3.2 · Chapter 3: Creating Panel Applications
Screen - Background Page
This section describes how to define the background of a screen. The following is an example of the Background page of the Screen Properties dialog box.
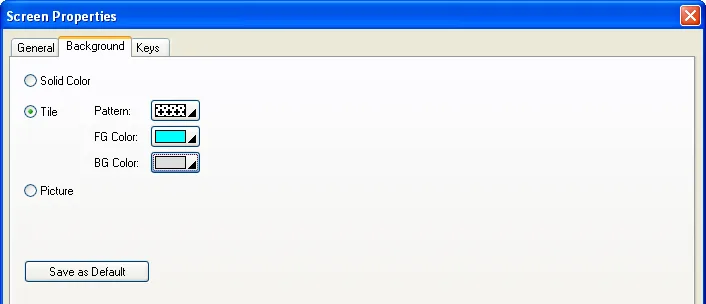
The following table describes each item in the Background page.
|
Property |
Description | |
|---|---|---|
| Solid Color | Check this option for the screen background to be filled with a solid color. | |
| <Solid Color> | Click the corresponding color button to specify the color used to fill the background. This item is available when Solid Color option is selected. | |
| Tile | Check this option for the screen background to be filled with a pattern. | |
| Pattern | Specify the pattern used to fill the background. Click the corresponding Pattern icon and select a pattern from the Pattern palette. This item is available when Tile option is selected. | |
| FG Color | The color used to paint the black part of the pattern. When the solid white pattern is selected, this color is not used. This item is available when Tile option is selected. | |
| BG Color | The color used to paint the white part of the pattern. This item is available when Tile option is selected. | |
| Picture | Check this option to have a picture background for the screen. | |
| <Name> |
The name of the picture. Use the drop-down list to
select a picture from the picture database. Click  to select a picture file. Then, the picture
of the selected file is imported and saved in the
picture database. Click  to bring up the Select/Import from Library
dialog box. Select a picture from a picture library
file. Then, the selected picture is imported and saved
in the picture database. |
|
| Stretch | Check this item so the picture can change its size automatically to fit the screen. | |
| Save as Default | Click the button to make the current background setting become the default setting. You need to save the project file to keep the change. | |
Need PM Designer itself?
V4 for current PK, PT, ITV and PM panels, V2 for older models. Free, sent by email.
Source.Section 3.9.3.2 of the PM Designer Software User Manual, Edition 2.0, © Cermate Technologies Inc. (www.cermate.com, service@cermate.com). Reproduced online, with the manual's own figures, by TSL Automation Solutions, authorised Cermate distributor, for users of Cermate HMI panels. PM Designer and PanelMaster are trademarks of Cermate Technologies Inc.
Text and figures are the manufacturer's and may describe features your panel or software version does not have. For a plain-language introduction read the PM Designer guide; for help with a specific panel contact TSL Automation.